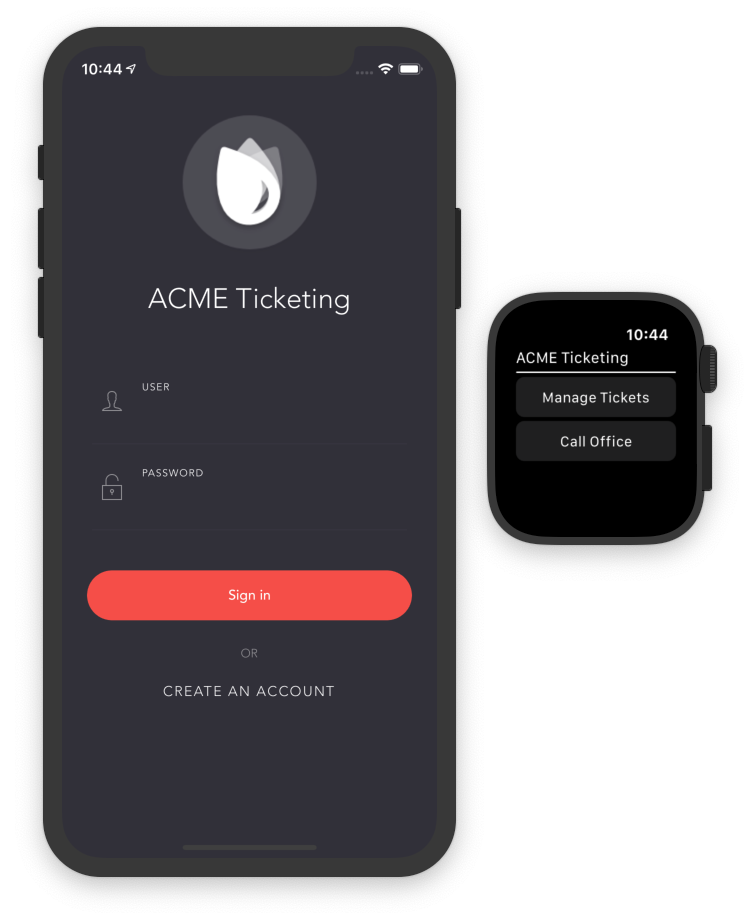
In this article we’ll look at how to develop a watchOS companion app for your NativeScript-built iOS app. If you follow this article’s steps you’ll build a simple watchOS app that looks like this.
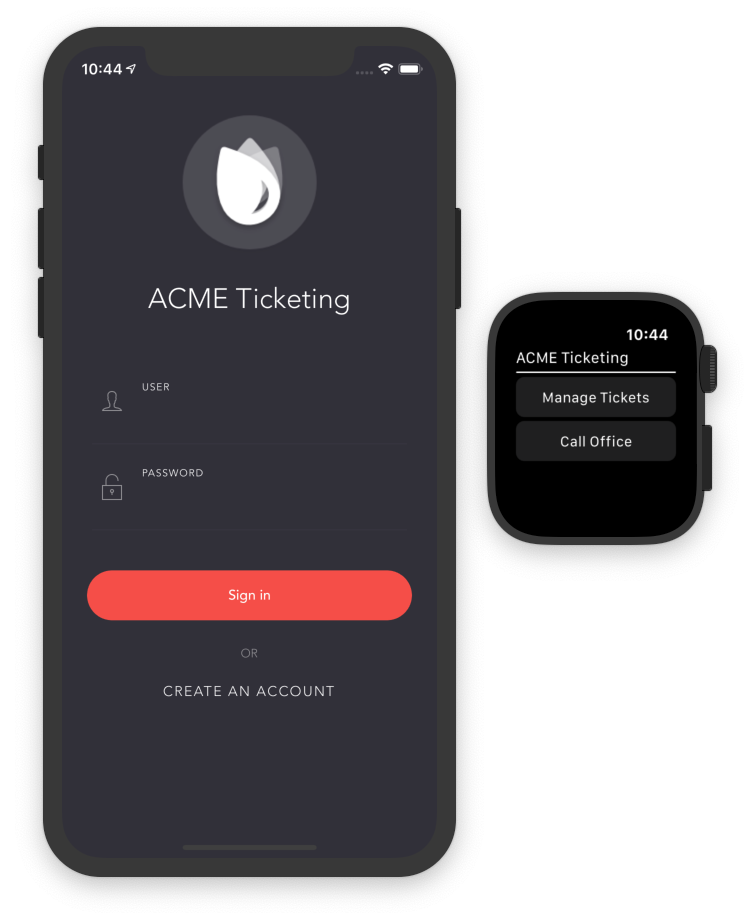
NOTE: The final code for this article is available on GitHub at https://github.com/ignaciofuentes/nativescript-acme-sample.
There are two important things I need to point out before we start. First, watchOS companion apps for NativeScript must be built with native code using Xcode. And because Xcode only runs on macOS, the following steps can only be performed on a Mac.
Second, watchOS support for NativeScript is currently in beta and has some limitations, such as only being able to develop your watchOS apps using Objective-C (and not Swift), and not being able to share native code between your main app and your watch extension.
That being said, the fact that you can now build a fully functional watchOS extension for your NativeScript apps is pretty exciting, and I encourage everyone to try out the workflow to see just how easy it is.
Let’s get started!
Your first step for developing a watchOS app is to open your NativeScript app in Xcode, which you can do by double clicking on your project’s platforms/ios/<projectname>.xcodeproj file.
NOTE: If your project uses Podfiles you’ll also have a
platforms/ios/<projectname>.xcworkspacefile, and you should open that file instead.

With Xcode open, go to the menu bar and select File --> New --> Target..., which brings up the dialog below.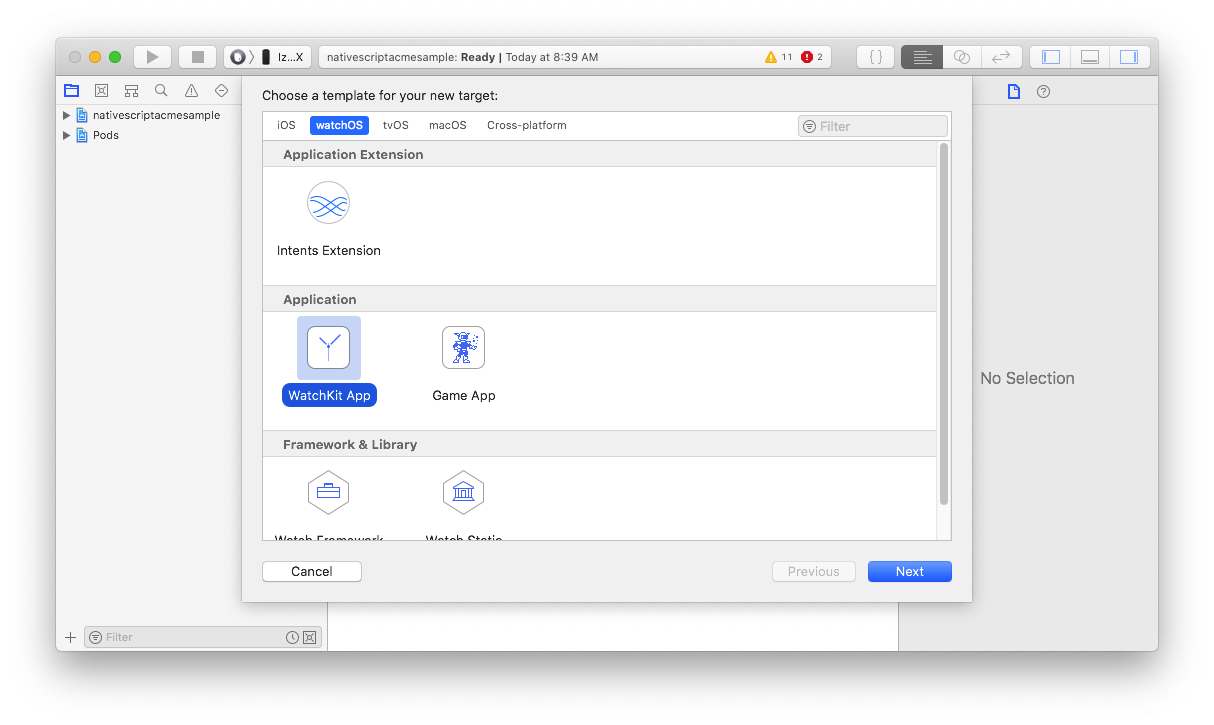
With the dialog open, switch to the watchOS tab and select the WatchKit App option (as shown in the image above). Click Next.
At the next screen, give your watch app a name and then click Finish.
NOTE: Make sure to leave the language as Objective-C, as it’s the only language NativeScript currently supports for watchOS development.

Xcode will ask you whether you want to activate a scheme for your new your app, which you’ll want to do because it’ll allow you to run your watchOS app, which we’ll do momentarily.
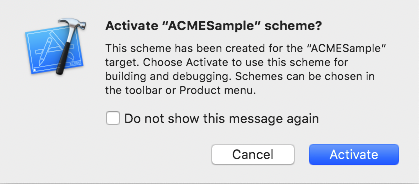
And with these steps complete you now have a simple watchOS ready for development.
Developing a watchOS companion app for your NativeScript is no different than building a watchOS app for a completely natively built iOS app. As such, any guides you find online for watchOS development will work just fine for NativeScript + watchOS development—with the one caveat that you currently have to develop your watchOS apps using Objective-C.
Here are a few resources you might find useful:
In this article we’ll create the world’s simplest watchOS app so you can try out the full development workflow.
To do so, start by expanding your new watch app in the sidebar on the left-hand side of Xcode, and then double click on the Interface.storyboard file. After you do so you should see the screen below.
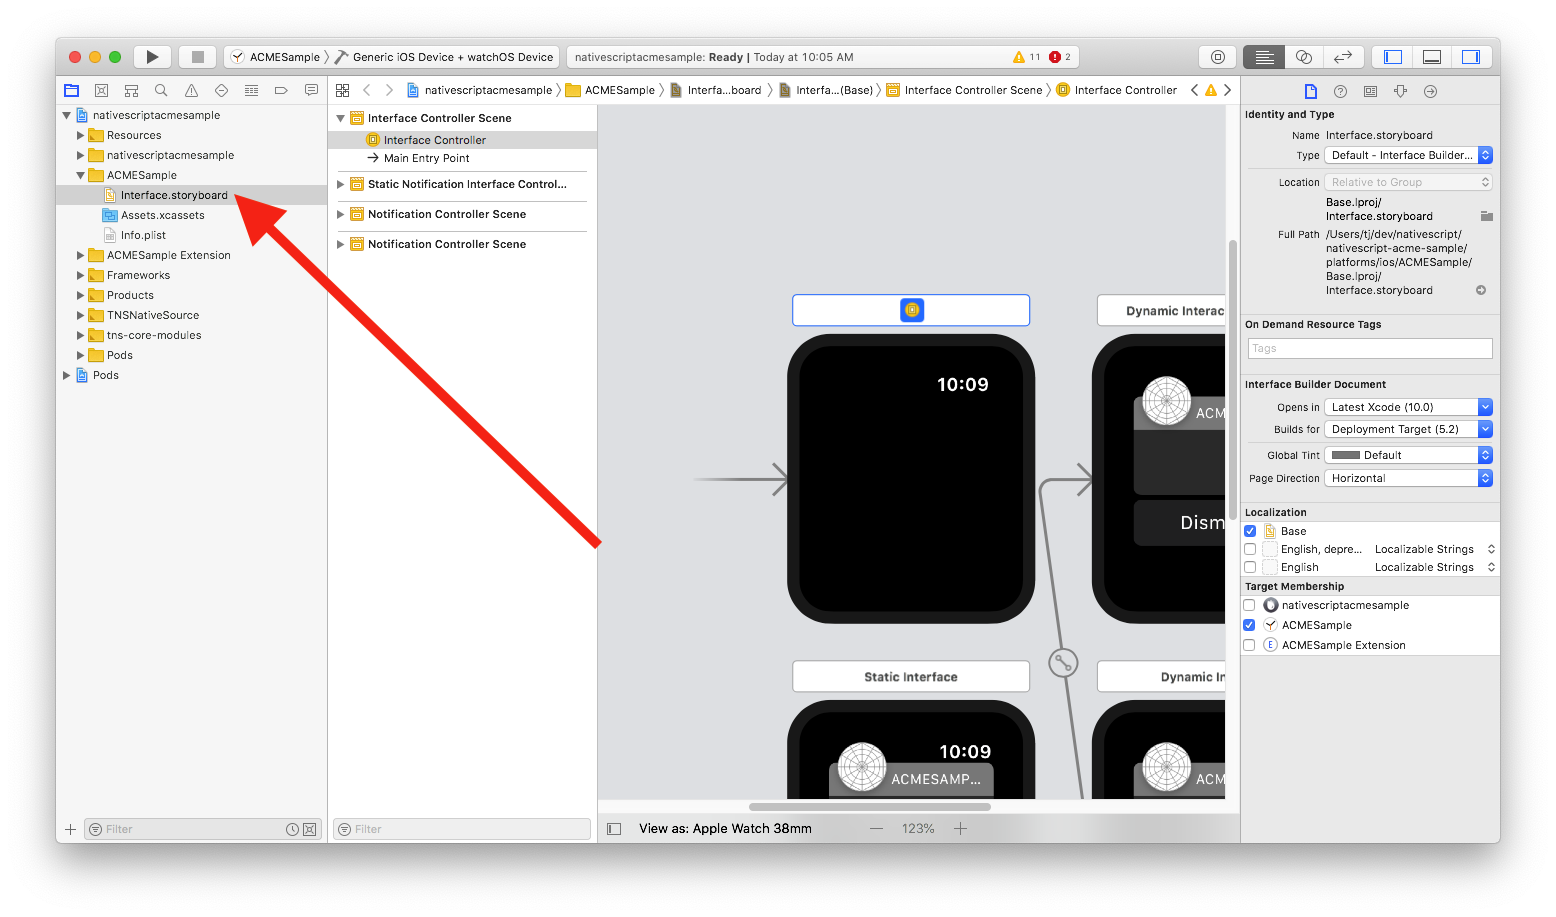
Storyboards are the mechanism Xcode provides for visual app development. There are many tutorials you can find online for learning about storyboards (here’s one I like), but for today’s purposes let’s just look at how to add a few visual components to your watch app’s main screen.
Start by finding the icon at the top of Xcode that looks like a square in a circle.
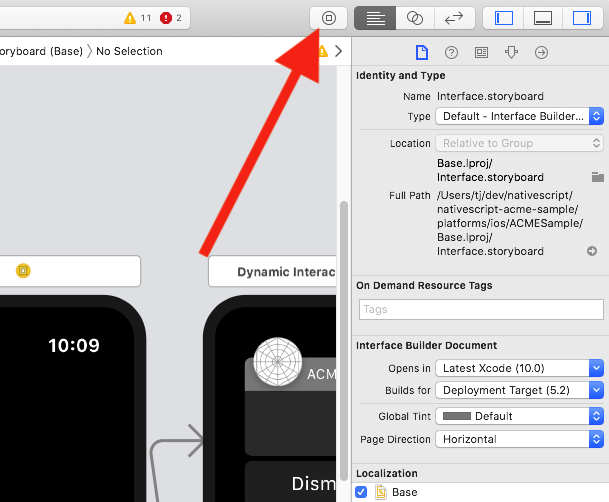
This button opens an object explorer you can use to visually drag user-interface components into your watch app. To get an idea of how exactly this works, check out the gif below.
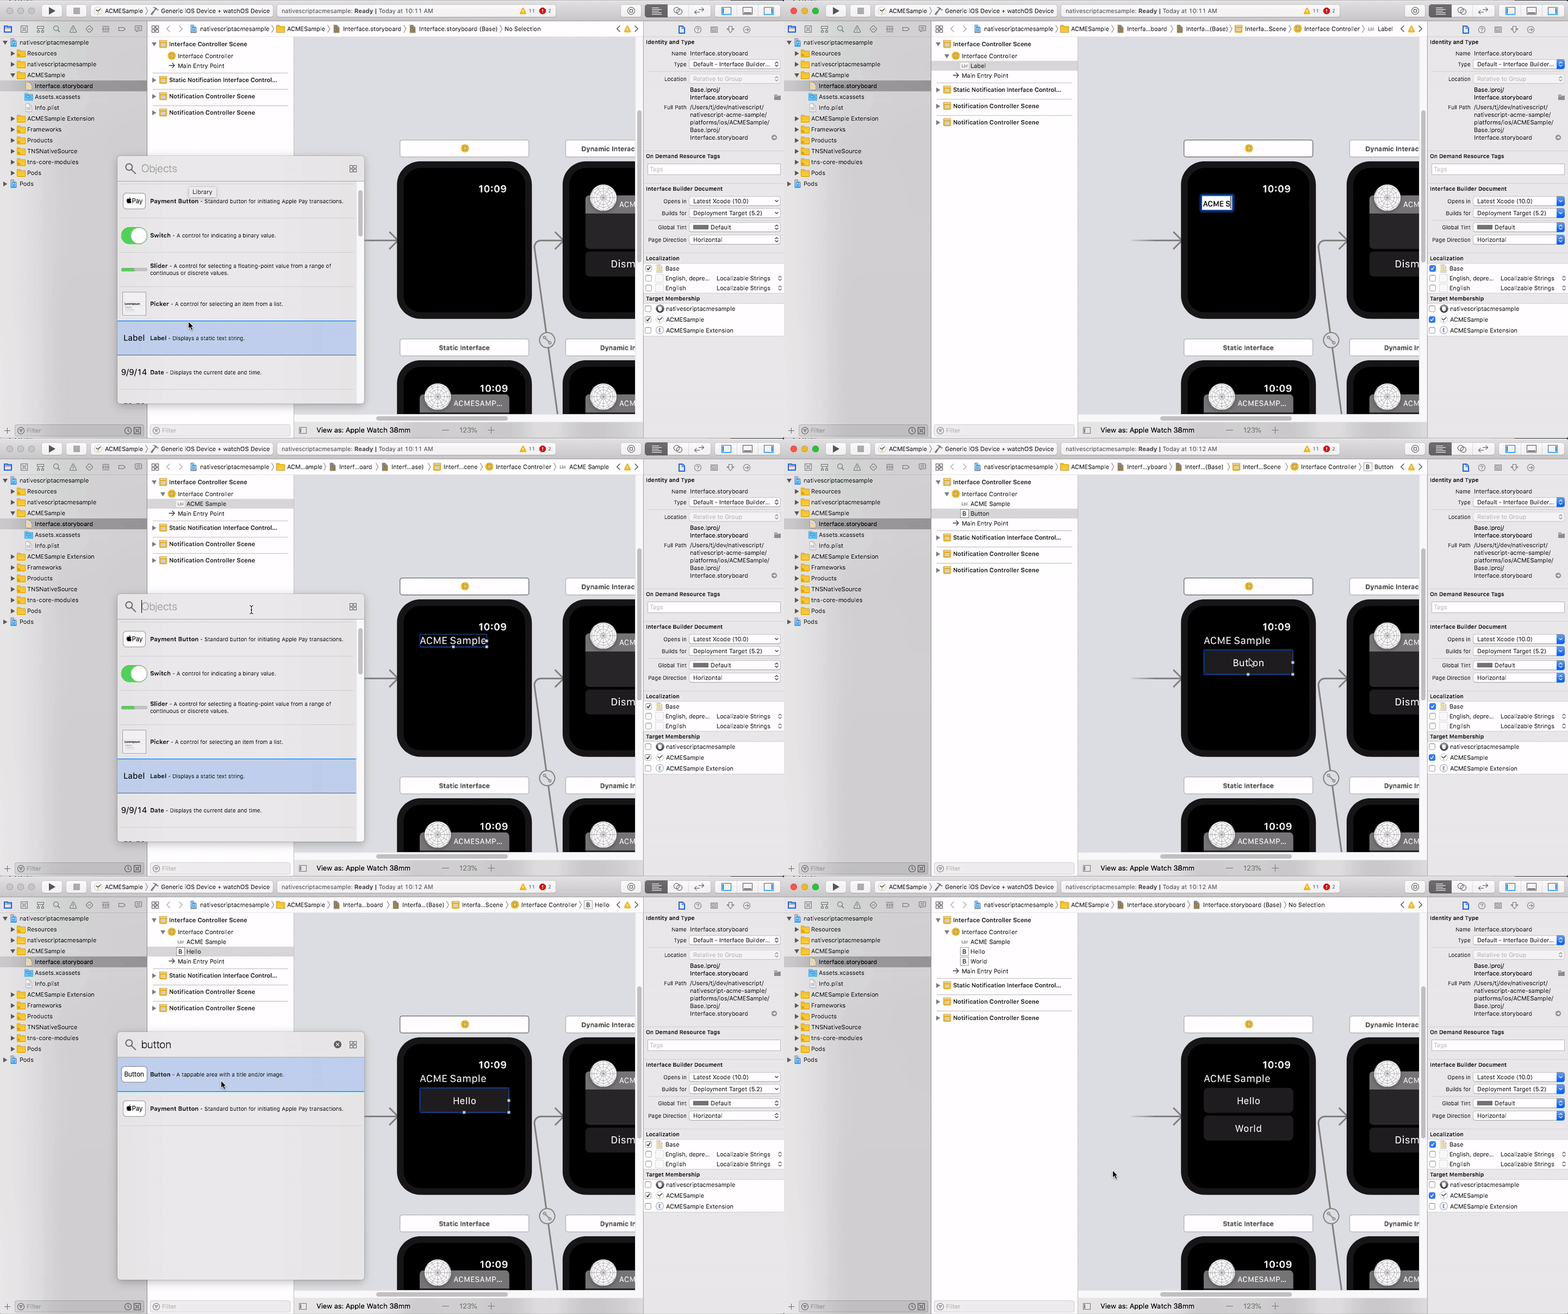
Go ahead and drag over a few UI components so you have something minimal that you can test out. When you’re ready, refer to the screenshot below to find out how to select and run your app on both an iOS and watchOS simulator.
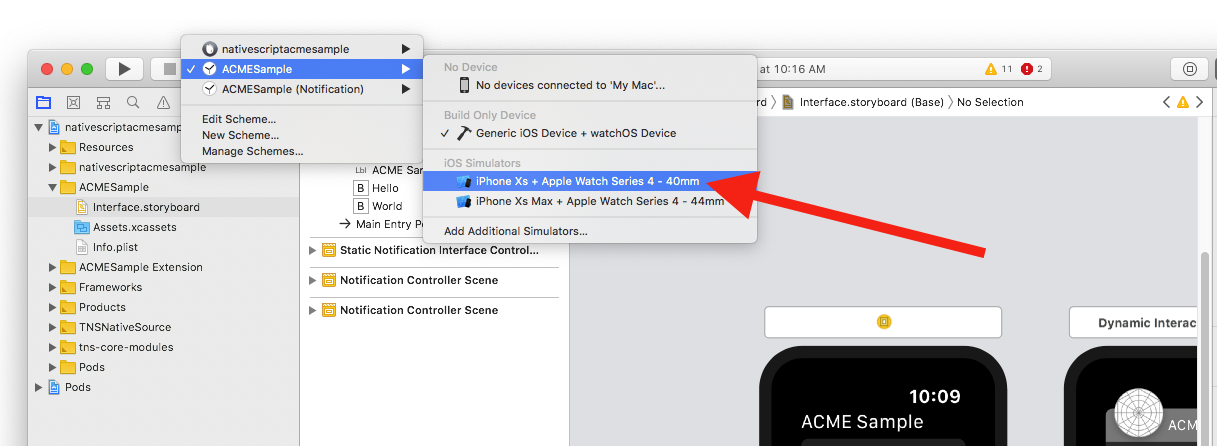
After you’ve selected the appropriate simulator combination, hit the play button in the top-left corner of Xcode to build and run your app. When the build completes, you should see your NativeScript-built iOS app along with your newly built watchOS companion app.
You’ve now created a watchOS app that you can test on a simulator. There’s one problem left to solve: currently, your watchOS app lives in your NativeScript app’s platforms folder, which is treated like generated code in NativeScript. And therefore, future builds can absolutely delete your watchOS app if you leave it in platforms.
With that in mind, your last step is to move your watchOS app to your NativeScript app’s App_Resources folder.
The NativeScript documentation on watchOS development has thorough steps on how to move your watchOS app from your platforms/ios folder to your App_Resources/iOS folder, so you should refer to that document for specifics, but I’ll offer a few quick tips here.
When you first open your platforms/ios folder you’ll find two new folders: one for your watch app, and another for what’s known as a watch extension.

The watch app is where the UI for your app lives, such as your storyboards and assets, and the extension is where all the code for your watch app lives. When getting started all you need to know is that you need both of these folders for your app to work.
TIP: This StackOverflow thread has more information on the difference between watch apps and extensions if you’re curious.
After you follow the NativeScript documentation for moving your files, which again is here, you’ll have a folder structure that looks like this.
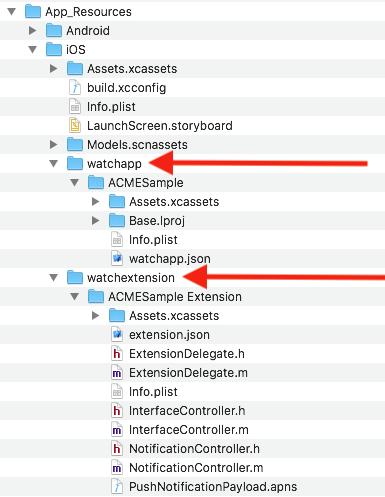
Note the new watchapp and watchextension folders, which are the locations you’ll want to copy and paste your watch app and extension from platforms/ios.
Note also the new watchapp/<watch app name>/watchapp.json and watchextension/<watch extension name>/extension.json files, which, at the time of this writing, should contain the following contents.
watchapp.json
{
    "assetcatalogCompilerAppiconName": "AppIcon",
    "targetBuildConfigurationProperties": {
        "WATCHOS_DEPLOYMENT_TARGET": 4.1,
        "LD": "\"\""
    }
}
extension.json
{
    "targetBuildConfigurationProperties": {
        "LD": "\"\""
    }
}
The cool thing is that, once you set up this structure, you can continue to develop your watchOS app in Xcode without having to do this setup again.
That is, you can open your ios/platforms/<app name>.xcodeproj (or ios/platforms/<app name>.xcworkspace) file, make changes to your watchOS app, and those changes will automatically be saved to your watch app in your App_Resources folder. There’s no need to copy and paste files once you’ve completed the initial setup.
If you followed through this article in its entirety you’ve now developed a simple watchOS app to compliment your NativeScript iOS app, which is pretty cool 🙂
I’ll end this article with a few important notes. First, the NativeScript ACME sample app on GitHub has a fully functional watch app that you can refer to at any time.
Second, NativeScript’s watchOS support is in beta. As such, if you are interested in watchOS development we’d love to hear from you. Should we invest more time polishing this workflow and adding more documentation? Are there features you’d like to see that we don’t offer today? Let us know in the comments.