And what’s in there actually?
Applications written with web means such as JavaScript and CSS are usually taken as web or hybrid. With NativeScript we enable these web skills allowing you to write in your favorite language (JavaScript or TypeScript - the choice is yours) achieving great, fast-performing
native apps. But, in the dawn of NativeScript and even now when it’s v1, we have been encountering non-believers who wonder “Are the NativeScript apps real native apps as they execute on the device? Or, they are hybrid after all :)”
With this blog post I would like to reveal the truth for the non-believers by dissecting a NativeScript app at runtime and displaying what UI elements are actually created and executed on iOS and Android. Well, I can tell you from now - these objects are the native UI components of the respective platform. But if you still don’t believe me, read on.
I don’t want to display too complex graphs of objects, but just to present the general idea, so for this purpose I am going to dissect the sample Photo Album app from our
Quick Start tutorial. I slightly changed the Photo Album repo to load two images by default instead of taking them from the camera, so that we can see right away how the images are represented in each platform.
The native app packages
iOS
If you run the app on the simulator or just build it, this will create an *.app file and the full path to it will look like:
Photo Album Native Code\platforms\ios\build\emulator\PhotoAlbumNativeCode.app.
This is the application file that is created when you build the app.
Right-click it, choose
Show Package Contents and you will be able to view the contents of your application. As you can notice there, you can view the JavaScript, CSS and XML files, as well the actual executable file of the project (hidden in metadata-armv7.bin) that uses the JS, CSS and XML files.
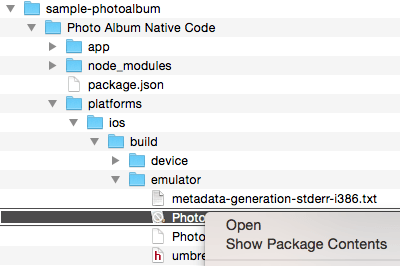
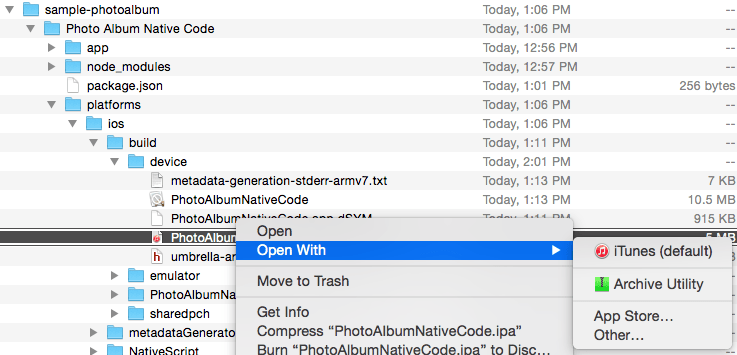
Let’s say that we want to run the app on a device. In this case, an *.ipa file is created and is then deployed and executed on the device. The *.ipa file is created at:
Photo Album Native Code\platforms\ios\build\device\PhotoAlbumNativeCode.ipa
Right-click the ipa file and choose
Open With >> Archive Utility. This will create a
Payload folder that contains the app file discussed earlier.
 Android
Building or running our Android project creates an *.apk application file at:
Photo Album Native Code\platforms\android\bin\PhotoAlbumNativeCode-debug.apk
Let’s see what’s in there. We can open it with any archiver as, in its essence, an *.apk file is a zip file. So, there, in the
assets\app folder of the apk archive we have the JavaScript, XML and CSS file(s) that we implemented to create the app, a few NativeScript service files, and a dex file that uses the JS, XML and CSS to run the app.

The native visual tree of runtime objects
We just saw that it’s JS, CSS and XML that is contained in the application packages. Based on the repo, we also know that we have a
GridLayout with a
ListView and a
Button, where the ListView contains two images wrapped in GridLayouts. Let’s see now to what these are transformed at runtime.
iOS
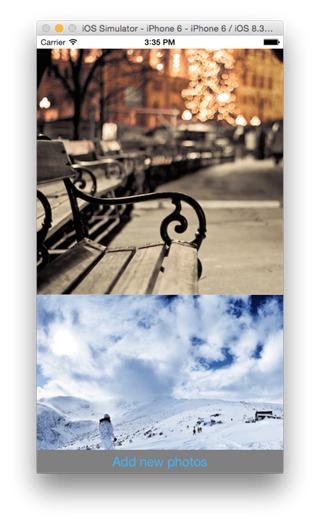
Go to
Photo Album Native Code\platforms\ios and open the
PhotoAlbumNativeCode.xcodeproj file that you will find there. This is the Xcode project representation of our NativeScript application and this project is compiled as you build the NativeScript app. We will now use one of the Xcode tools to inspect the hierarchy of objects at runtime.
With the Xcode project opened, run the app using the Play button of Xcode, specifying the Simulator device model. Let’s say it is iPhone 6.
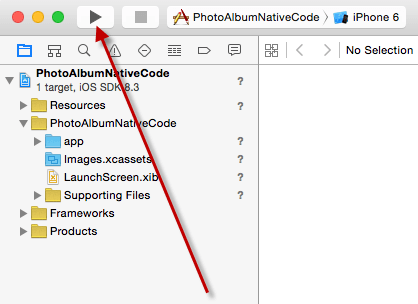
Make sure the Xcode IDE is the active window, and from the top menu, choose
Debug >> View Debugging >> Capture View Hierarchy .
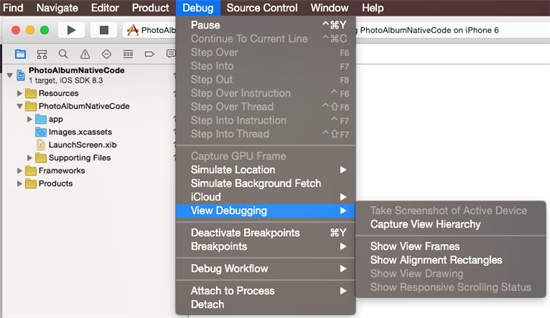
Voila! The application runtime object structure is revealed and… as you can see it’s all a hierarchy of native iOS objects. Starting from the UILayoutContainerView and UINavigationTransitionView (being there because by default we include a UINavigationController), going down through the UITableView used for the ListView wrapper, continuing with the UIImageViews used to show the images. Of course, at the bottom there are the UIButton with the UIButtonLabel representing the NativeScript Button.
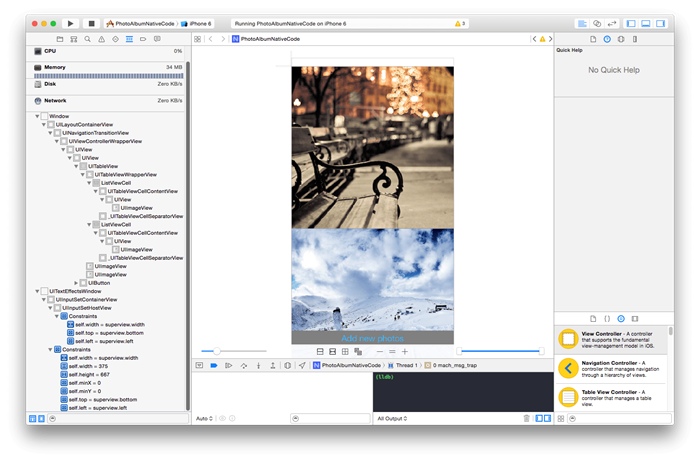 (click the picture to enlarge it)
Android
In order to inspect the hierarchy of native elements, we can use a standalone tool called
monitor that is a part of the Android SDK. Usually, you can find it at your
[Android SDK Folder]\tools\monitor.
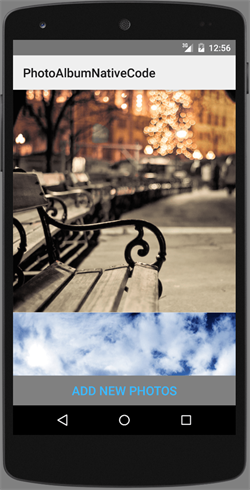
Supposing that we have run the app with
tns run android --emulator and we have the running application in place, open the
monitor app and from the left-side panel select the
NativeScriptActivity which will show the hierarchy view of the native objects that the NativeScript application has.
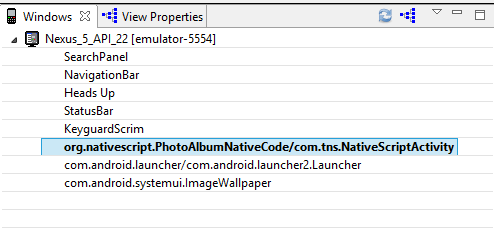
As you can see below, we have only objects native to the Android platform - Android ListView for the NativeScript ListView, Android Button for the NativeScript Button, Android ImageView for the NativeScript Image. There are also objects for the navigation control on the top.
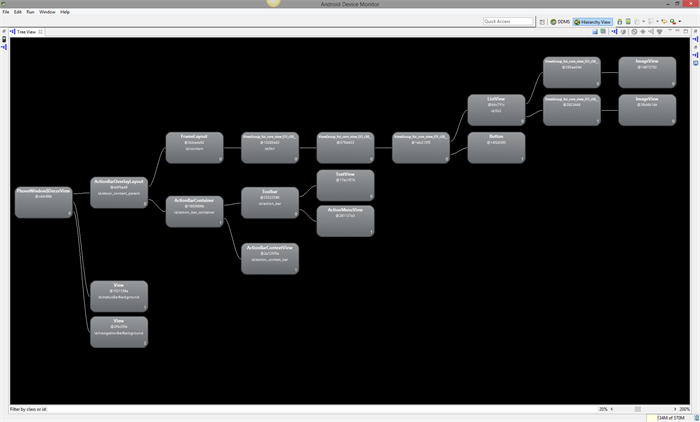
So, there you have it - the proof that it’s an app of native objects that is executed on the device - no hybrid stuff or WebViews whatsoever. The next time somebody comes to you with “These NativeScript guys, they make a hybrid thing”, show them this blog, they’ll be amazed. :)


