NativeScript has one of the biggest ecosystems around it, probably the biggest and most mature one for a mobile development framework. We combine the iOS and Android native ecosystems by supporting any native library and we also support npm.js and JavaScript ecosystems. We don’t know the count of all the libraries that exist in those ecosystems, but you can use many of them inside your shiny new native mobile application created with NativeScript. Combine this with our full native API support and you will understand why we can enable many scenarios out of the box.

One of the frequently asked questions is if it is possible to use your JavaScript skills with NativeScript and implement an app for wearable devices. The answer to this is Yes you can and in this blog post we will show you how to build an app that runs on the Android Wear devices. With our 1.1 release coming in two weeks we will support also Apple Watch devices so a future blog post will be dedicated to Apple Watch. If you are impatient check our WatchKit sample that uses the latest code from our GitHub repo.
Enough said, let’s start real coding :).
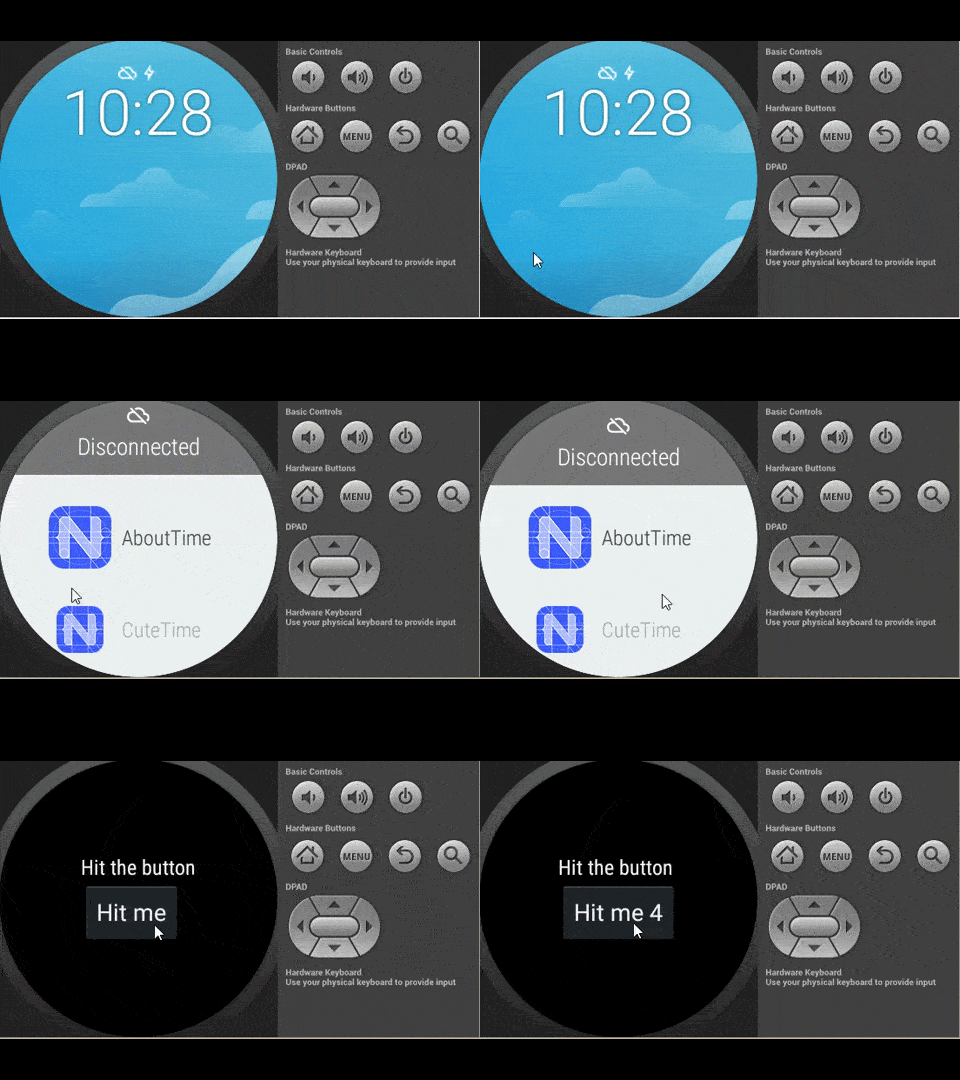
First let’s show what we are building.

Let’s start by creating a new project and add the Android platform to it.
tns create AboutTime --appid org.nativescript.aboutTime
cd AboutTime
tns platform add android
This will create a NativeScript application with the correct project structure for Android applications. We need to change things a bit to make it support Android Wear.
Go to AboutTime/platforms/android directory and edit the AndroidManifest.xml file.
Add this line next to the <uses-permission ...> statements
<uses-feature android:name="android.hardware.type.watch" />
and change the application theme to
android:theme="@android:style/Theme.DeviceDefault"
Go to AboutTime/app directory and remove all files except App_Resources directory.
Create a bootstrap.js file in AboutTime/app directory and require the mainpage from it
require("./mainpage");
var MainActivity = (function (_super) {
__extends(MainActivity, _super);
function MainActivity() {
}
MainActivity.prototype.onCreate = function () {
_super.prototype.onCreate.call(this, null);
var resID = this.getResources().getIdentifier("activity_main" , "layout", this.getPackageName());
this.setContentView(resID);
var buttonId = this.getResources().getIdentifier("button" , "id", this.getPackageName());
var button = this.findViewById(buttonId);
var counter = 0;
button.setOnClickListener(new android.view.View.OnClickListener("AppClickListener", {
onClick: function() {
button.setText("Hit me " + ++counter);
}}));
};
return MainActivity;
})(com.tns.NativeScriptActivity);
app.init({
getActivity: function(intent) {
if (intent.getAction() == android.content.Intent.ACTION_MAIN) {
return MainActivity;
}
else {
fail("Unknown action");
}
},
onCreate: function() {
__log("Application on create called");
}
});
This creates a MainActivity class and sets an click handler on the Button defined in layouts xml file below.
Create the UI layout for the MainActivity.
Go to AboutTime/platforms/android/res directory and create a layout directory there
Create a file activity_main.xml in the layout directory AboutTime/platforms/android/res/layout/activity_main.xml.
<?xml version="1.0" encoding="utf-8"?>
<RelativeLayout xmlns:android="http://schemas.android.com/apk/res/android"
xmlns:tools="http://schemas.android.com/tools"
android:layout_width="match_parent"
android:layout_height="match_parent">
<LinearLayout
android:layout_width="wrap_content"
android:layout_height="wrap_content"
android:layout_centerHorizontal="true"
android:orientation="vertical"
android:layout_centerVertical="true">
<TextView android:id="@+id/text"
android:layout_width="wrap_content"
android:layout_height="wrap_content"
android:text="Hit the button" />
<Button android:id="@+id/button"
android:layout_width="wrap_content"
android:layout_height="wrap_content"
android:text="@string/hit_me" />
</LinearLayout>
</RelativeLayout>
Build your first Android Wear project with NativeScript
tns build android
Deploy your application to Android Wear Emulator and start the AboutTime application
adb -e install AboutTime-debug.apk

The code for this sample is here: sample-Android-Wear
Follow us on twitter @NativeScript and star our NativeScript GitHub repo for more interesting code samples.
Cheers,
Lubomir Blagoev
The NativeScript Team