One of the first things we learn as programmers is "don't re-invent the wheel". You will probably need to add native touches and special functionality to your mobile apps as you work through your development cycles, and to do that, you’ll most likely use community-built or official NativeScrpt plugins. If you check the NativeScript market you can find a plugin for most of the advanced features that you want to have in your app. But getting those plugins to work in your NativeScript-Vue apps is not particularly straightforward, at least until you know how to do it. In this article, I’m assuming that you have created an app in the preferred way, using a template from within the Vue CLI.
Installing plugins in the official vue-cli template is not done the same way as in other NativeScript projects.
TIP: Watch the NativeScript-Vue 2.0 webinar on YouTube: NativeScript-Vue 2.0: Back to the Vueture
Let's look at how we install plugins by installing the plugin nativescript-star-ratings.
Step 1: Open the terminal and cd to the root of your project.
Step 2:
Instead of installing the plugin with the tns plugin add command, run the following command:
$ npm install nativescript-star-ratings
This installs the plugin at the root of the application in the node_modules folder.
Step 3:
$ npm run clean
This clears the dist folder if the project was previously built.
Step 4:
Run your project again:
$ npm run debug:android
Note: You can change
androidtoiosif you are using that platform
Step 5:
Require and register the plugin in main.js after you import Vue:
import Vue from 'nativescript-vue'

Vue.registerElement('StarRating', ()=> require('nativescript-star-ratings').StarRating)
The registerElement function expects the name of the XML element as the first argument, and a function that returns the plugin as its second argument.
Step 6:
Use the plugin. In the template block, add the following:
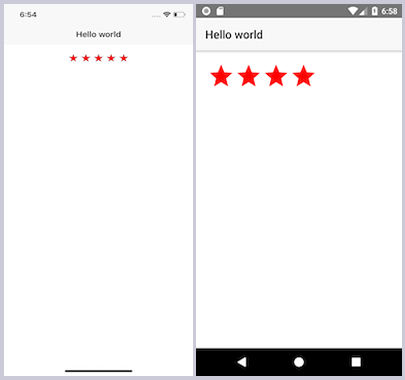
<StarRating emptyBorderColor="white" emptyColor="white" filledBorderColor="black" filledColor="red" value="2" max="5"/>

You’ve successfully installed, registered, and used a plugin within a NativeScript-Vue app built using the Vue CLI!
What if my plugin doesn’t require XML tags?
If you are using a plugin that does not use XML tags then you can skip steps 5-6 and add it as a const in your single file component. An example is using the speech recognition plugin:
const SpeechRecognition = require('nativescript-speech-recognition').SpeechRecognition;
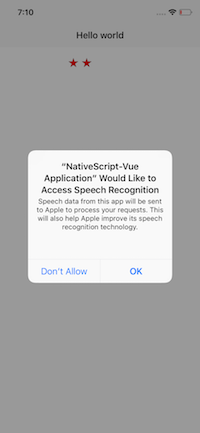
These type of plugins might need extra initialization; the speech recognition plugin, for example, must be initialized in the data block. Then in mounted (on iOS), you can check whether permission has been granted to access the microphone:
export default {
    data: () => ({
      speechRecognition: new SpeechRecognition()
    }),
    mounted() {
        this.speechRecognition.requestPermission().then((granted) => {
            if (!granted){
                alert("It seems that you haven't enabled the microphone. Please visit your app settings and let this app listen to your voice!")
            }
        });
    },
  }
The result:

Each plugin will be a little different in its initialization pattern, but these two examples cover the basic use cases that you’ll encounter as you work through using plugins.
What’s going on here?
NativeScript-Vue apps’ use of plugins resembles the patterns we use in NativeScript with Angular, rather than in NativeScript Core. For example, we don't add namespaces in the StarRatings tag or on the Page element, as you do when building NativeScript Core apps. This is because in step 5 we used the "magical" registerElement function and that handles the namespacing automatically for us.
So how does this all work? When you run the app in Step 4 it sees that the dist folder was cleaned (in step 3) and regenerates the app. This bundles all the plugins that you added into the dist folder. If you do not do step 3 then it will not bundle your newly added plugins into the dist folder and they won't be available to you.
In future versions of this template the plan is to remove step 3. So please check the documentation for the vue-cli template and the #vue Slack channel to see when step 3 is no longer necessary.
Plug ‘n’ Play!
Plugins are critical to the successful completion of any NativeScript app. Fortunately, we have a vibrant community who build and iterate of them incessantly; noteworthy are Osei Fortune’s efforts to ‘vue-ify’ his suite of plugins: an example is his pager plugin, which has documention on its Vue implementation. Other prolific plugin authors are ‘Vue-friendly’ such as the inimitable Eddy Verbruggen. Just reach out on the Slack channel!